
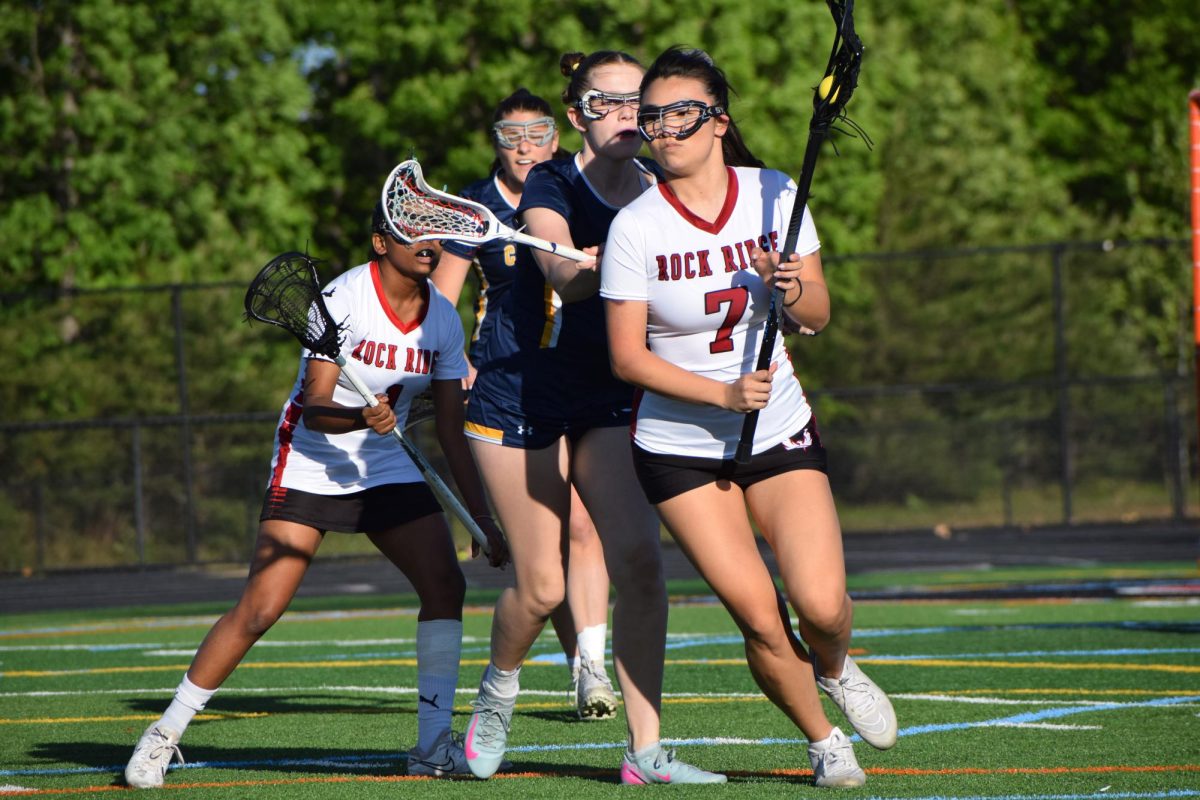
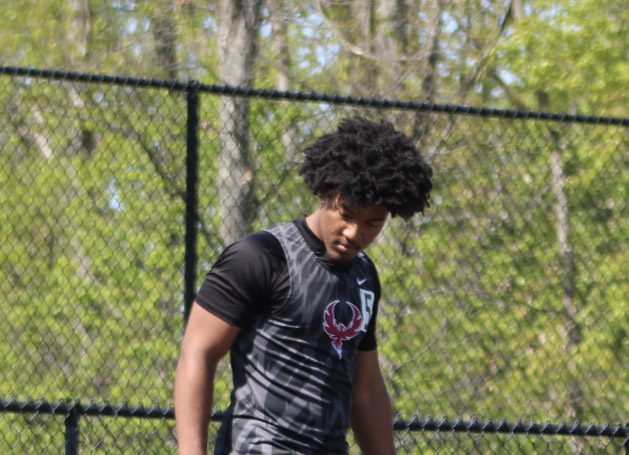
![Phoenix gets in position to initiate the beginning of an intense game. “It's coming to the end of the season here, so [our goal] is to just focus on working harder,” senior lineman Ryan Abbondanza said.](https://theblazerrhs.com/wp-content/uploads/2025/10/DSC_0042-1200x800.jpg)


As people rush to the store to find their last-minute gift for Valentine’s Day, trying to figure out what to get their significant other, they forget the meaning behind the gift. They focus on whether the gift is shiny enough or big enough, not caring whether the thought put into it counts. Teenagers especially, settle for the boring box of chocolate and flowers with a cute card accompanying them out of desperation for something that will satisfy their partner. They forget that they don’t need to spend money to give someone a present, they can simply create it. With these five DIY gifts and their step-by-step instructions, you can make your significant other, friends, or even family members a Valentine’s Day gift they’ll never forget.
“Open When…” Container
Sometimes people find themselves in a sour or sad mood, making them feel the need to take a trip down memory lane with words of encouragement. The container contains color-coded arrangements from which a person can choose from. Each color will represent a different “Open When” moment, such as “Open when you need a compliment” or “Open when you want to read one of our memories.”
Materials:
- Colored pieces of paper
- Pens or markers
- Scissors
- Jar or container
Steps:
- Select the color of each category. This will help the person know what color to pick for the mood they are in at the moment. For example, the cards in yellow will be for the person who wants to read a memory of the two of you, the cards in blue for when the person feels sad or frustrated, etc.
- Once the card colors are decided, write down what you’d like for each category and add it to the container/jar.
- You can choose to decorate the container with hearts, but be sure you’ve got room for the color guide. This way the person knows what color to choose even when they’ve forgotten what you told them it represents, finalizing the gift.
Kiss Canvas
This Kiss Canvas shows what song comes to mind when thinking about the person receiving the gift, whether it’s your partner or your friend. The Kiss Canvas can contain a simple quote at the bottom, but the example used is Spotify-themed, therefore it will look more like what Spotify shows when looking at a song.
Materials:
- Paint canvas
- Lipstick
- Markers or paint brushes with paint of your choice
- Pencil
- Scissors
- Painters Tape
Steps:
- Use the tape and put it around the corners. Stop the tape ¾ of the way down the long side, so you should have the tape surrounding the canvas ¾ of the way.
- Next, put the lipstick on and start kissing the canvas inside the square shape the tape made on the canvas. Granted you’ll need to kiss the canvas hundreds of times but it’ll be worth it in the end.
- Remove the tape once you are done and you can begin this Spotify-themed canvas. Underneath the area where the kisses are, choose a song you both like, or something that reminds you of them.
- Use the paint or marker to create a Spotify-like theme. Add the play button with a skip and rewind button above a line at the very bottom of the painting. This will represent the music “playing.” The name and artist of the song would be above it all, and you are done.
Memories Flip Book
Remember the history you and your significant other, friend, or family member have had throughout your time together by giving them the best pictures of you and them together. This flip book will allow them to easily and effortlessly flip through your memories in heart-shaped form.
Materials:
- Colored pieces of paper (if wanted)
- white paper
- Scissors
- Glue stick
- Pictures you want to add
- Color pencils and markers
- Pictures cut out into hearts
Steps:
- You’ll first need to grab the pieces of paper and cut them into even-sized hearts. The hearts should be bigger than the pictures you plan on using on the Flip Book. For this example, there will be 6 pieces of hearts.
- Then with the white piece of paper cut it into a long strip that’s as wide as the hearts are. This will be the strip that moves the pictures as a person pulls it towards them.
- Once the strip is cut, grab one of the hearts and put it on top of the strip with the tip touching the bottom of it. Then, you’ll mark where the curves of the heart end. Above the line you just drew, create another line no bigger than half an inch. Repeat the lines five more times, and you’ll have seven lines drawn on the strip.
- Start folding the paper back where each line is. This will allow flexibility for moving in between each picture
- Afterward, grab one heart and put glue on the tips of the curves. Once you’ve done that, glue it in between the first and second lines you drew. The second heart should be between the second and third lines, the third between the third and fourth, and so on.
- Once you’ve finished gluing the hearts to the white strip of paper, you can start to glue the pictures you’ve chosen for the project on top of each heart.
- Finally, create another strip of paper that you’ll fold horizontally to create a pocket where the hearts will go. This strip should be open on both ends in order to pull the first white strip of paper.
“Reasons Why I Love You” Box
A fun, simple way to let someone know how much you care for them is just what they need. Sometimes people need to know how much they are appreciated, and a fun handmade box saying exactly those things in tiny heart envelopes is the best way to do just that. This “reasons why I love you” DIY box is perfect for couples, friends, and family members.
Materials:
- Scissors
- One Pink, or color of your choice, Paper
- Glue or Tape
- Ruler
- Pen or Marker
Steps For The Heart Envelopes:
- Outline on the white piece of paper a heart as big as the palm of your hand and cut it out. Repeat this process as many times as you’d like, for each heart is a reason why you love the person
- Once you’ve got the hearts, fold up the tip of the heart till the tip is touching the halfway mark of the heart.
- Then, fold the curves of the hearts vertically till they line up and create a rectangle-like shape
- Fold up the curves to meet and go under the tip of the heart to finish the shape of the envelope
- Add a heart-shaped stamp to close the heart once you’ve written the message and you’re done
Steps For the Box:
- You will need to outline the shape of the box. For the outline, you will need to create a square shape in the middle of the paper as big as the hearts made earlier for the envelopes.
- Then, at each side of the square, create a rectangle connecting to it where the length is as long as the side and the width is at least two inches. Inside each rectangle create a heart in the middle of them for the “windows” looking into the box.
- At the right side of each rectangle create a small trapezoid. This will serve as what you’ll use when gluing or taping the box together.
- Once you’ve finished the trapezoids on each rectangle, above the last rectangle facing you, you’ll add another square that’s the same size as the first square surrounded by the rectangles. Once you’ve done that you can add a trapezoid above it, ending the outline of the box
- Finally, you will need to cut out the outside of the shape, as well as the hearts inside the rectangles
- Fold in the trapezoid shapes, then add glue to the outside of the shapes. Once you’ve done that, glue the outside of the trapezoid inside the box. Repeat for each trapezoid connected to the rectangles.
- Now that the box is put together, add in the envelope and you are done with the “Reasons Why I Love You” box.
Cardboard Record Player
If the receiver of the gift is more old-fashioned or prefers vintage-like gifts, this Cardboard Record Player is just the gift for them. This gift is similar to the theme of music in the Kiss Canvas, but this one shows the person that they are your favorite song. While all the other gifts were easy to make and took an hour at most, this gift is more complex and requires more materials, but it still shows how much you really care about them because of the time you took to make the gift.
Materials:
- Cardboard
- Scissors (preferably ones that can cut cardboard)
- Markers
- Black and white paper
- Pencils
- Glue
- White, red, and black paint (if wanted)
- Paint brushes
Steps:
- The record player will be the first to make, and the hardest. Similar to the box for the Reasons Why I Love You gift, you’ll need to create the outline for it. Refer to the Reasons Why I Love You Box Tutorial to see how the outline is made. Granted the difference is, that instead of a square in the middle, it’ll need to be a rectangle as big as you want the box to be, and do not create and cut out the hearts on the rectangles beside the length of the outline. Once you’ve made the outline, start to cut out the outline and glue the sides like in the Tutorial to put it together.
- Now you’ll need to create all the little details that will go on the box, as well as paint the inside of the box black and the outside red to cover the cardboard, or you can cover the cardboard color with white paper like in the example.
- For the details, you’ll need to create the vinyl. This vinyl will be created out of a black piece of paper in the shape of a heart. Then, you’ll need to create a mini heart in the middle of the vinyl, where the needle will go. Afterward, use the white paint and create random lines surrounding the heart. Grab the leftover cardboard and create a smaller version of the heart, paint it black, and glue it on the left side of the box, this is where the paper vinyl will lie on top of it. Now you’re done with the vinyl itself.
- The rest of the details are easy, you’ll need to create a needle that normally touches the vinyl with a white piece of paper. You’ll also need two round pieces of paper made out of black paper and one rectangle piece out of yellow paper. The round paper will go on the bottom right, one above the other. These represent the volume and the yellow rectangle is what holds the needle. This will be placed at the top right corner of the box. You’ll need to glue the needle on top of it and place it facing the vinyl.
- Lastly, On the part inside the box where the decoration details are not, you can add a sign that says “You’re my favorite song” to finish off the record player.